Creating a New Item
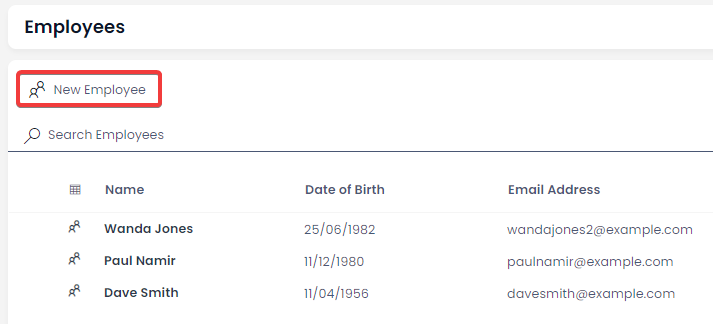
When viewing a Table, click on the New (Table Name) button in the Command Bar. The button will have an icon that matches the Item icons in the Table.
This will open the Create Screen panel, which will prompt you to enter data and to create the item. Your system administrator may disable some fields from being visible on the Create Screen.
The + Create button will create the Item and return you to the Table. The Create and Open button will create the item, and open that item in your browser.
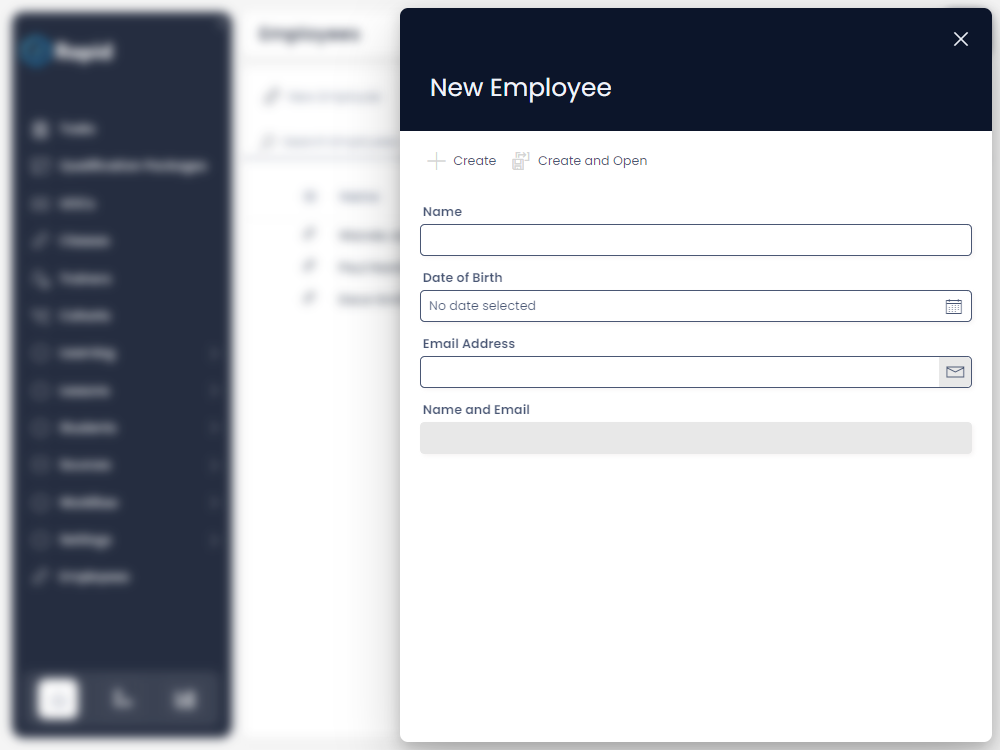
Note that some fields may also be visible, but disabled. This is indicated by fields that have a grey background. In this example, the "Name and Email" field is a Subquery field, so it cannot be edited by a user.
Creating a New Sub-type of Items
If you are viewing a table that has subtypes, your system administrator may have created additional buttons to create items. For example, in the Rapid Standard Assets Module, there are several "New X Asset" buttons that will each create a different subtype of item on the same table. To learn more about this, visit the following link: TODO
Cloning an Item
It is also possible to "clone" an item. When an item is cloned, Rapid will open the Create Screen, and copy across the data from the current item, to the new item. This enables you to quickly build similar items without having to enter data multiple times.
For example, if your company owned two vehicles with the same Make, Model, and Year, you could use the clone tool to copy this information and reduce the time spent entering data.
To clone an item:
-
Open an Item in Explorer
-
Find the Clone button in the Jumbotron at the top of the site. This button will only be visible when you are viewing an Item Page.

- The data from the original item has now been copied across to the fields in the Create Screen Panel.
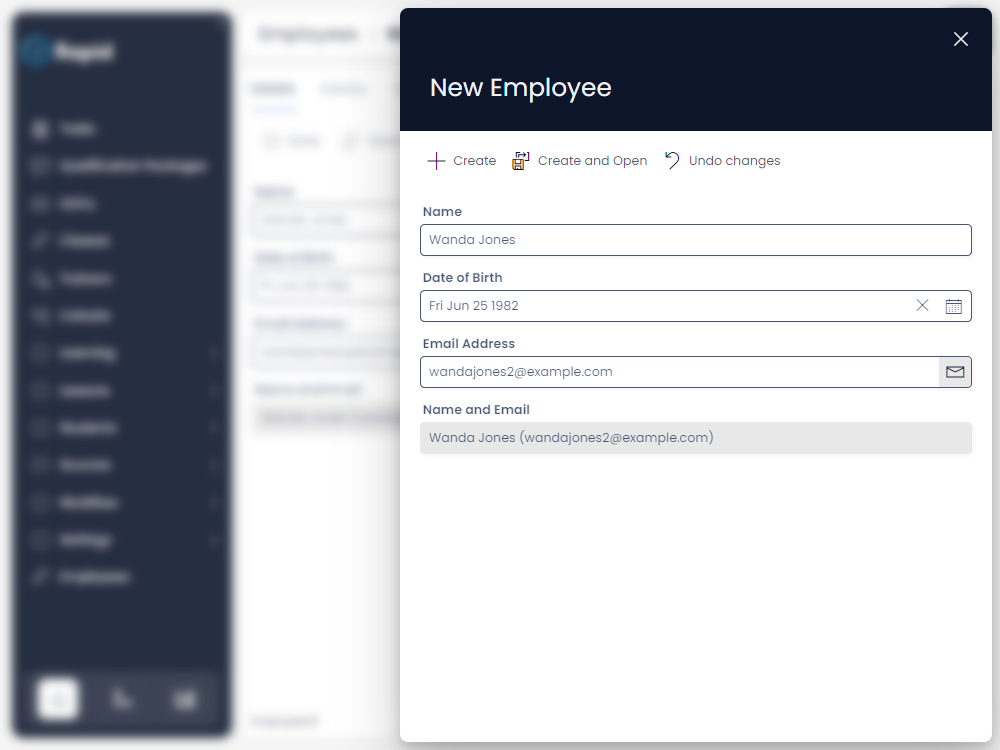
- Press the Create or Create and Open button to create the Item. Alternatively, you can press the Undo Changes if you do not wish to cancel.
Creating items in context
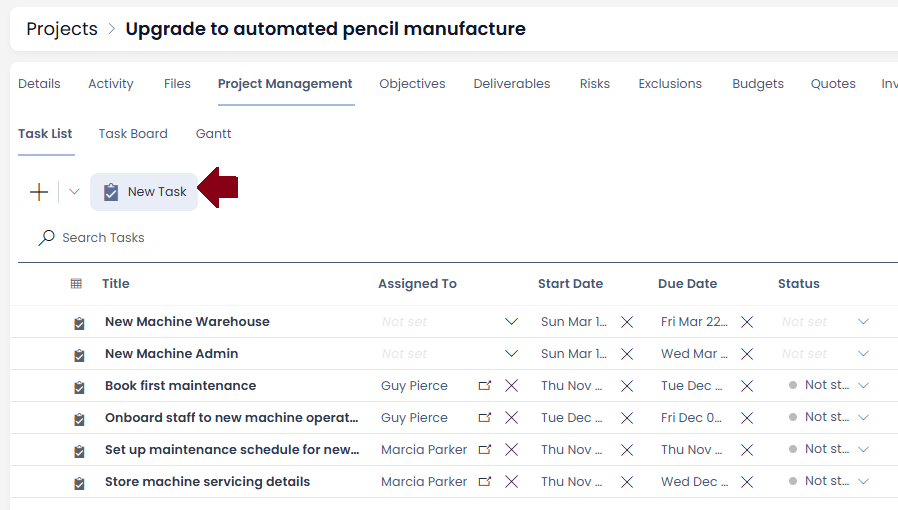
When viewing an item you can have a page component that shows another set of items; typically the Table, Board and Gantt components. Each of these allow for the creation of new items within the context of the current item.
For example, when viewing a Project and navigating to a Tasks tab you can create see the associated tasks for that Project and create new ones. Creating a task here would be creating a new Task in the context of the Project.
When creating an item in context Rapid will automatically attempt to create a link between the new item and the context item. This will allow the newly created item to be displayed in that context.
Creating the link follows two rules:
- If the new item has any lookups that can point to the context, each of those lookups will be populated with the context item; otherwise
- A new universal link is created between the new item and context item
Notably, multi-lookups will not be regarded when generating this new automatic link.
There is a special case that is not immediately obvious, all items have a Parent lookup that targets their own kind. Thus the Parent lookup will always be used when making items within the same context, for example a child task within a parent task.